Follow these six simple steps to ensure your premium roller banner is set up safely and stands perfectly straight for your event.
Step 1: Unpack the Components
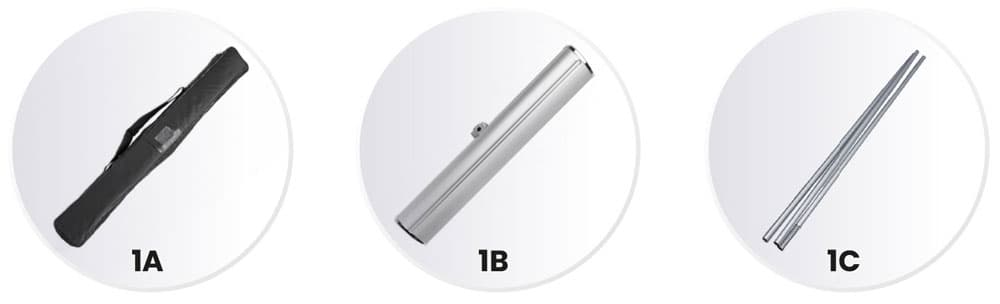
Begin by clearing a small space on a flat surface to unpack your banner kit.
Unzip the carry case (1A).
Remove the banner base (1B).
Retrieve the pole (1C), which is conveniently located within a dedicated compartment in the base.
Step 2: Prepare the Base
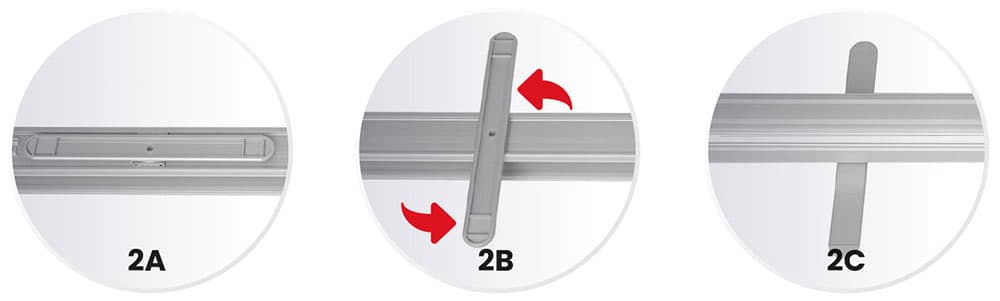
The base must be correctly stabilised before the graphic is extended.
- Lay the base (2A) face down.
- Turn the support feet (2B) 90 degrees so they are perpendicular to the base.
- Flip the base back over so it stands upright and stable (2C).
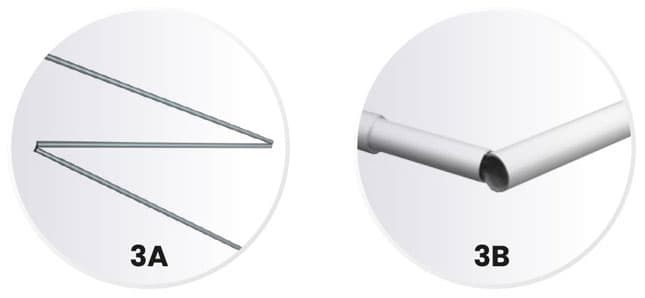
Step 3: Assemble the Support Pole
Our banners use a shock-corded pole system for quick and easy assembly.
- Unfold the pole segments (3A).
- Slot the pieces together (3B) to create one straight, rigid support pole.
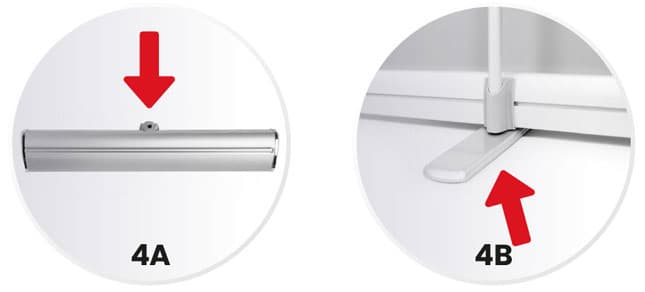
Step 4: Secure the Pole to the Base
Ensure the pole is fully seated to prevent the banner from leaning.
- Insert the pole into the designated hole in the base (4A).
- Ensure the pole reaches the very bottom of the base (4B) for maximum stability.
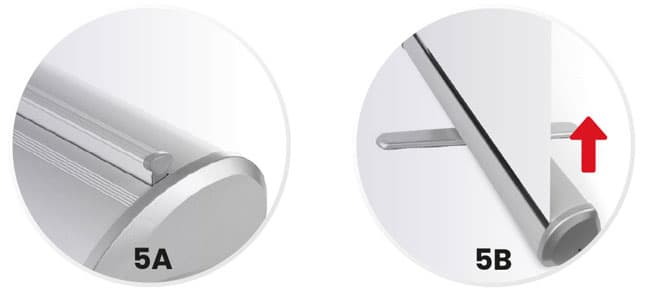
Step 5: Extend the Graphic
This step is best performed by standing behind the banner.
- Stand on both base feet for support (5A).
- Use both hands to slowly and evenly pull the graphic upward from the base (5B).
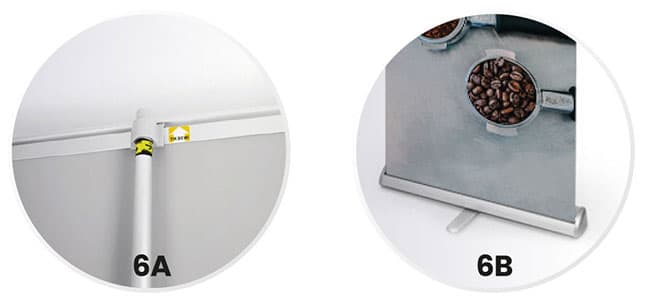
Step 6: Lock and Display
The final step secures the banner at its full height.
- Attach the upper support rail of the graphic onto the top of the pole (6A).
- Your banner is now ready for display (6B).
To Disassemble: Simply reverse these steps, ensuring you guide the graphic back into the base slowly to avoid damage.
Additional Print Support and Resources
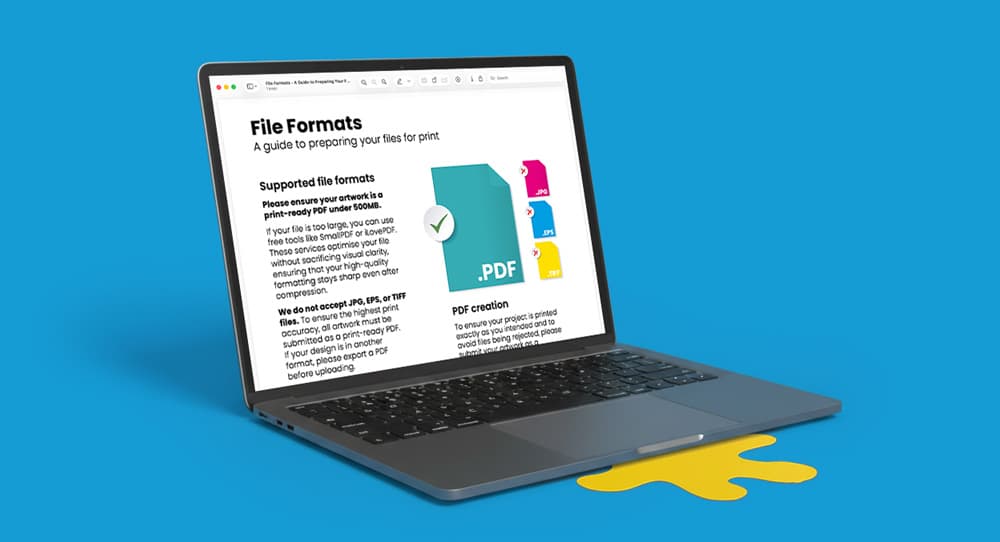
Need more help? Explore our additional support guides for expert advice on artwork setup, print file preparation, bleed and crop marks, colour setup, large format artwork and troubleshooting common print file issues.
Our support guides also cover paper stock selection, premium print finishes including spot UV and Scodix, preparing print-ready artwork and understanding the best setup for a wide range of printed products.
Before ordering, you can also use our artwork technical check tool to identify common artwork problems, including low resolution images, missing bleed, incorrect dimensions and RGB colour profiles.
You can also browse our full range of print products, including banners, business cards, flyers, posters and large format printing solutions.
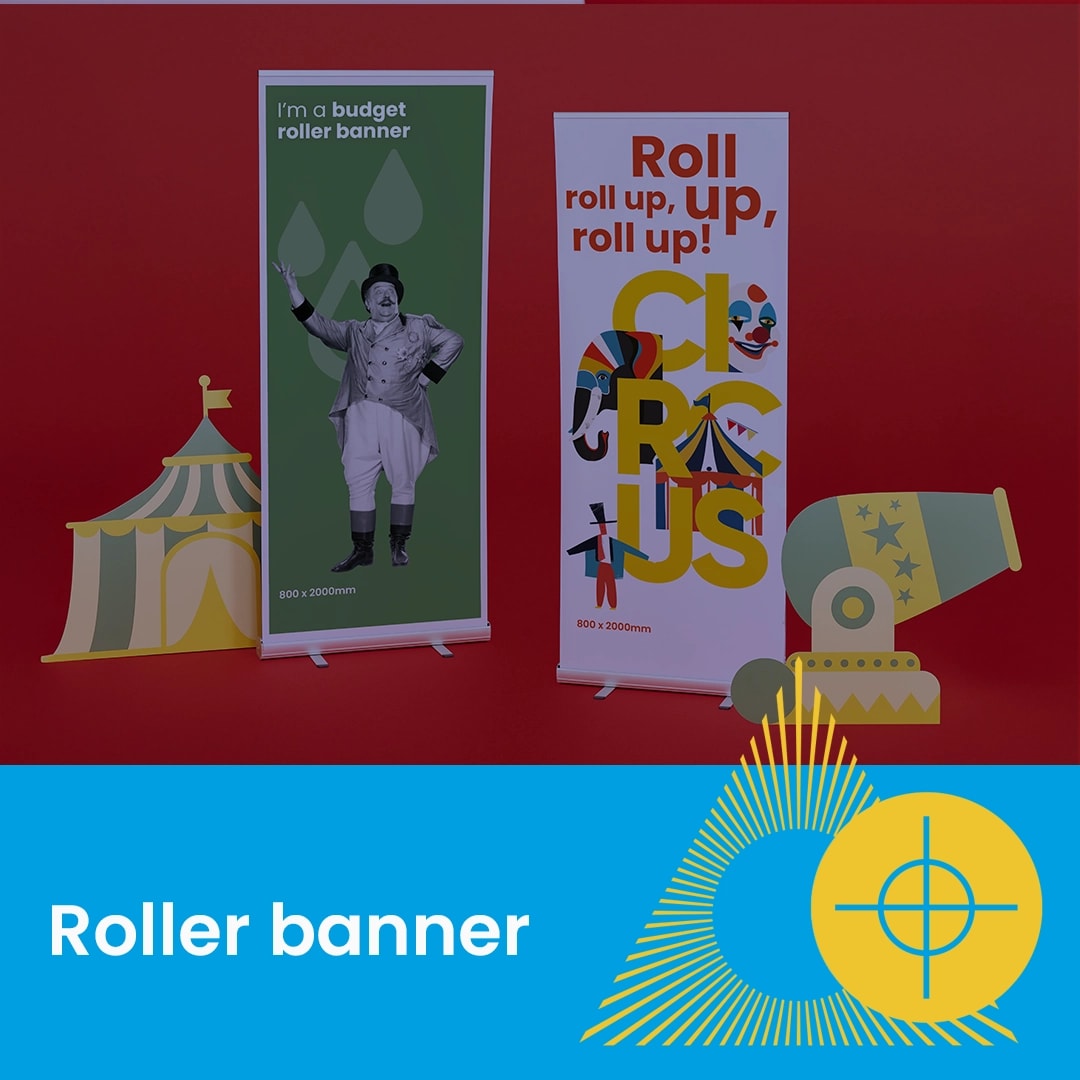
Explore Premium Roller Banners
Discover premium roller banner printing with high quality display systems and professional print finishes designed for exhibitions, events and branded displays.