Prices
Publishing your first book can feel overwhelming because there are lots of moving parts: writing, editing, design, printing, and getting it in front of readers. The good news is that you can break the journey into a clear process and tackle it one step at a time. Self-publishing is also more competitive than ever. Bowker reported that the number of self-published titles with ISBNs rose 7.2 percent in 2023 compared with 2022, topping 2.6 million.
We print books every day for first time authors, and we know where the process commonly gets confusing or expensive. That is where our Print Sorcery comes in: practical guidance that makes the print stage feel like magic, even if you're not sure where to start. This guide is built to remove the guesswork, showing you what matters when you're preparing a book for print, how to avoid the mistakes that cause delays, and how to move from a finished manuscript to a printed book you can confidently sell.
By the end, you will have a practical checklist for each stage and a clear next step to take towards printing and publishing your book.
The first step is about getting your manuscript to a stage where it is complete, coherent, and ready to be polished. Printing and publishing become much easier when you're not still changing chapters, because late rewrites can affect page count, layout, and even the spine width on your cover.
Before you go deep into drafting, get clear on who the book is for and what they will get from it. This keeps your writing focused and helps later when you write your blurb and book description.
Write these three lines and keep them at the top of your draft:
An outline is not about restricting creativity. It is a quick way to avoid getting stuck halfway through, and it reduces the amount of rewriting you will need later.
Choose the version that fits your book:
A realistic routine is what turns an idea into a finished book. Small, repeatable sessions build momentum and make it easier to return to the project even on busy weeks.
A practical approach:
Editing is where your book starts to feel professional. The aim is to improve structure and clarity before you worry about layout. Formatting comes later and should only happen once the words are stable.
Work in this order:
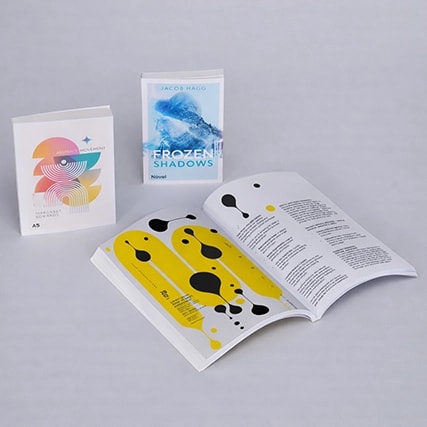
This step turns your manuscript into a finished product. The aim is to lock in your format first, then create print-ready files that match it. That order matters because changes to size or page count can affect margins, spine width, and cover alignment.
Before you export anything, decide on the physical book you want readers to hold. This choice affects how your pages are laid out and how your cover is built.
Quick guidance - Novel size and A5 usually work best for text-led books. A4 is often better for manuals, workbooks, and image-heavy content where you need more space on each page.
Your interior file needs to be stable and consistent so it prints cleanly and reads comfortably. The goal is not just to make it look good on screen, but to ensure it holds up in a bound book.
Tip - If you want to reduce the chance of layout problems, start with our blank templates set up to the correct size and build your file from there.
Your cover has two jobs: it must sell the book and it must align accurately in print. The most common issue for first-time authors is spine setup, because spine width depends on the final page count.
This stage is about reducing risk. A technical check helps catch file issues, and a proof copy lets you judge the real world result before you commit to more copies.
This step is about taking your printed book from a finished product to something readers can actually buy. The key is to make a few clear decisions first, then execute a simple launch plan you can repeat.
Before you think about quantities or marketing, decide where your sales will come from. Your main sales route affects everything that follows, including what information you need on the back cover and how you plan your printing.
Tip - Pick one primary route and one secondary route so you stay focused and do not spread your effort too thin.
Not every first book needs every publishing extra. This task is about choosing only what supports your sales goals, so you avoid unnecessary cost or complexity.
Tip - If you plan to sell through retailers, make sure your back cover design includes space for a barcode.
Printing should support your selling plan, not dictate it. This task helps you choose the right route so you can launch without over ordering, while still keeping your book available as interest grows.
Short run is ideal when you want to start small or test demand. With us, short run can start from as little as one copy, which is useful for proofing, reviewer copies, and early sales.
Choose short run when:
Long run suits larger quantities when you know you need stock ready for sales activity. It is a strong option for launches, events, and bulk orders where you want plenty of copies available.
Choose long-run when:
A practical first-time approach - Order a small launch batch, then move to long-run printing for proven demand, events, or bulk needs, while using short-run to keep the book available between bigger orders.
Pricing is easier when you use a repeatable rule rather than guessing. This task is about covering your costs, leaving room for profit, and staying aligned with what readers expect.
Tip - Direct sales often allow better profit even at a competitive price, because you keep more of each sale.
A launch does not need to be complicated. This task is about putting the basics in place so you can create consistent visibility and make it easy for people to buy.
Two weeks before launch
Launch week
After launch
Step 4 is what happens after the excitement of launch week. Most books sell over time, not overnight, so this stage is about building steady visibility, improving conversion, and matching printing to real demand so you stay cost-effective.
Rather than constantly promoting in bursts, create a routine you can keep. Consistency helps readers discover you gradually and gives you more chances to convert.
Tip - Create two to three content themes, such as behind the scenes, reader questions, and key quotes, then rotate them.
Small changes to how your book is presented can increase sales without needing more traffic. This task is about making your listing clearer, more persuasive, and easier to find.
Tip - If people ask the same questions repeatedly, add a short FAQ to the sales page and answer them directly.
Feedback is not just for the next book. It can improve this one. This task is about spotting patterns and making small updates that increase reader satisfaction.
Tip - Make changes in batches rather than constantly, so you keep your version history clean.
This is where you let real demand guide your next print decision. The goal is to keep books available while staying cost effective, using the right method for the right moment.
If you expect to place repeat orders, our rewards scheme gives you cashback on regular printing, helping reduce the cost of future print runs as your sales grow.
Tip - Plan event stock backwards: estimate likely sales, add a buffer, then order in time for delivery.
Step 5 is about turning your first book into a long-term asset. Once the basics are working, small improvements can increase discoverability, raise the value of each sale, and make your next publishing project much faster and smoother.
After launch, the goal shifts from announcement to being easy to find. This task focuses on improving the language and signals that help search and shoppers understand your book quickly.
Tip - If you only improve one thing, improve the first two lines of your description. That is where many buying decisions start.
New formats give you more ways to sell and more price points. This task helps you expand without having to create a completely new book.
Tip - Use short-run for small updates and low-risk testing. Use longer run printing when demand is proven or you want the best unit cost for an event or bulk order.
Many authors earn more by offering a next step rather than relying on a single purchase. This step is about increasing average order value while keeping the offer simple.
Tip - Bundles work especially well with short-run printing when you want stock ready for direct sales.
A printed book is also a credibility tool. This task focuses on using it as proof of expertise or storytelling, which can lead to sales you would not get online.
Tip - Keep a one page sheet ready with the book summary, intended reader, and purchase options. It makes outreach easier.
Your second book is usually easier because you already have a process. This task is about capturing what worked and building a repeatable system.
Tip - Even a simple outline and a working title is enough to keep the next project moving.
You're closer than you think. If you take one step at a time and focus on doing the basics well, you can turn your manuscript into a book that looks professional, feels great in the hand, and is ready to share with readers. Start small, make decisions with confidence, and let your first printed copy prove that this is achievable. When you're ready for more help, our Book Super Centre is there with practical guidance and resources to support you as you move from idea to finished book.
Posted on February 10, 2026 by WTTB
Related topics:


£85.13
£117.25
£136.00